If you have not tried Ubuntu 16.04 LTS, you should give it a shot. I installed it in VirtualBox and satisfied with the performance. It has been released under the Code named Xenial Xerus.
Note: LTS stands for long-term support that means five years of free security and updates.
Main Features of Ubuntu 16.04 LTS
- Snap application format
- Updated Packages.
- Linux Kernal 4.4
- Python 3
and much more
For More information about features, check the Release Notes at the below link:
https://wiki.ubuntu.com/XenialXerus/ReleaseNotes
This tutorial covers step by step guide to install Ubuntu 16.04 LTS on Virtual Box.
Before Installing, Download Ubuntu 16.04 LTS and Virtual Box from the links below:-
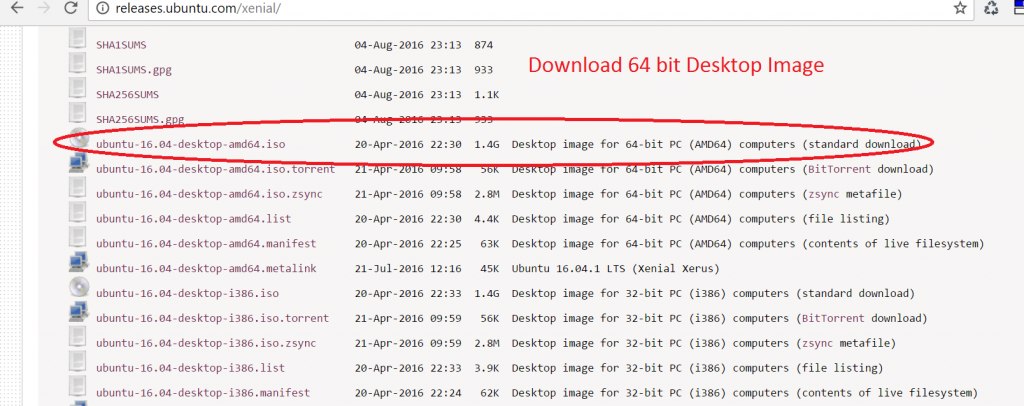
1.Click here to Download Ubuntu 16.04 LTS.
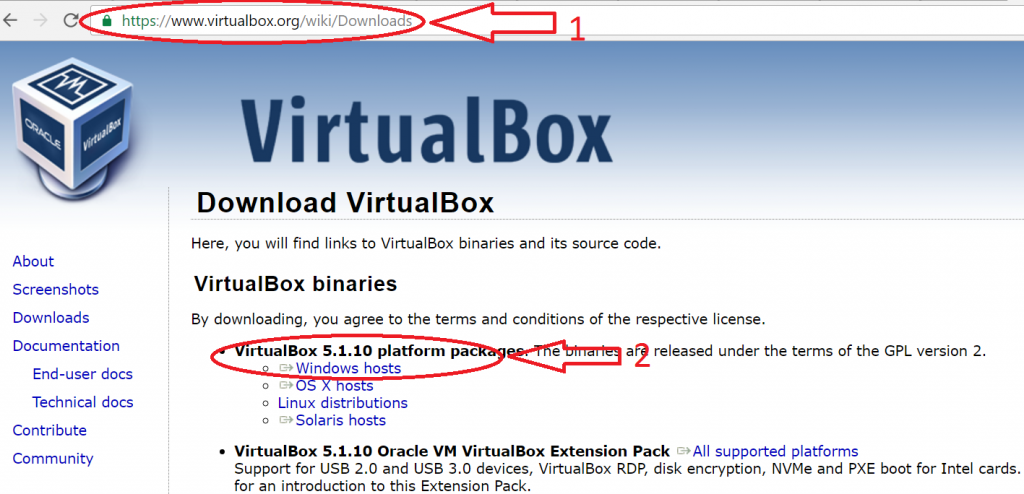
2. Click here to Download Virtual Box.
Please see the images below for detailed explanations.


After Downloading VirtualBox, Double Click on the setup file and follow the wizard to install it. Open VirtualBox.
Note: If you get error like “This host supports Intel VT-x, but Intel VT-X is disabled”. Go to your BIOS and Enable this.
Let’s begin installing Ubuntu 16.04 LTS on VirtualBox
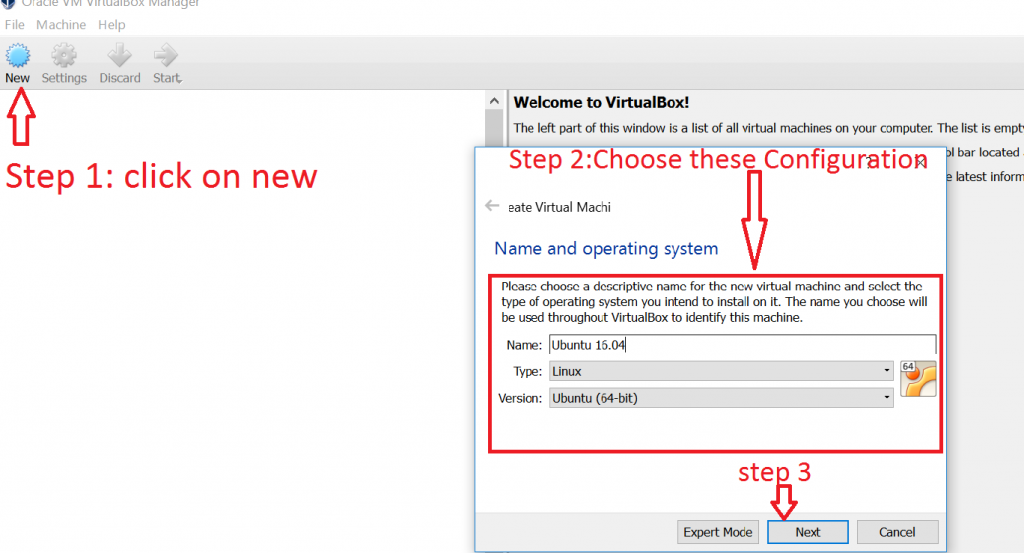
Step 1: Open Virtualbox and click on “New” Button.
Step 2: Choose your new virtual machine configuration like name, type and version as mentioned in the below image.
Step 3: Click on “Next” Button.
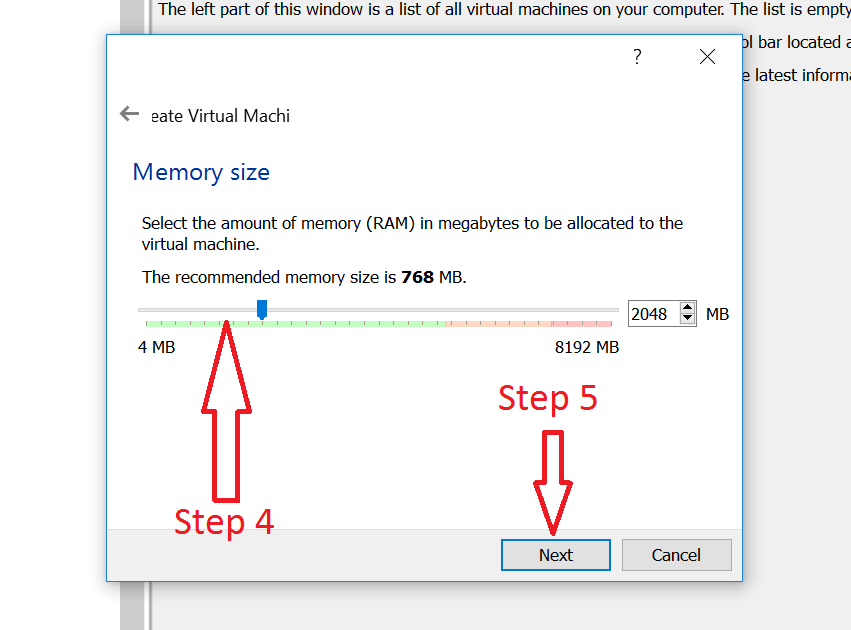
Step 4: Give RAM to your Ubuntu Virtual Machine. I recommend give at least 2 GB but if you are on low memory, you can give the recommended memory size of 768 MB.
Step 5: Click on “Next” button.
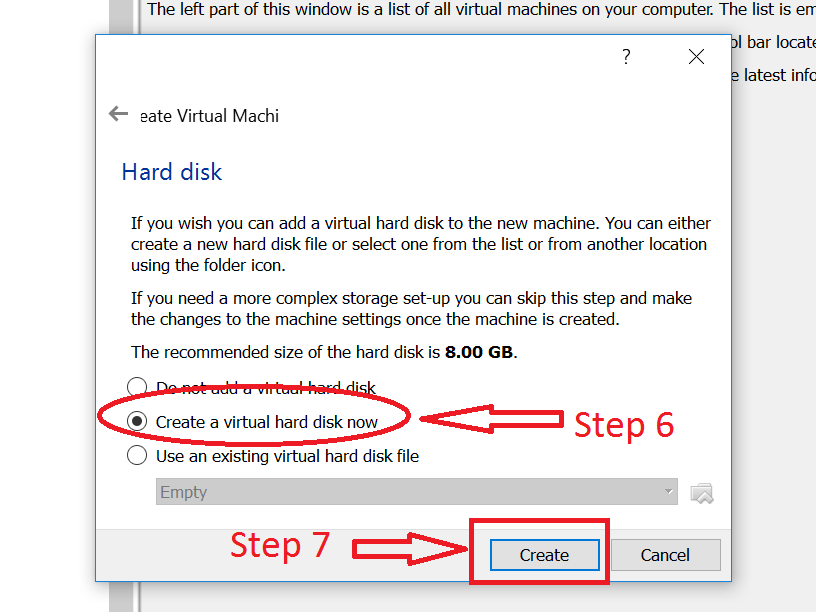
Step 6: Select “Create a virtual hard disk now”.
Step 7: Click on “Create” Button.
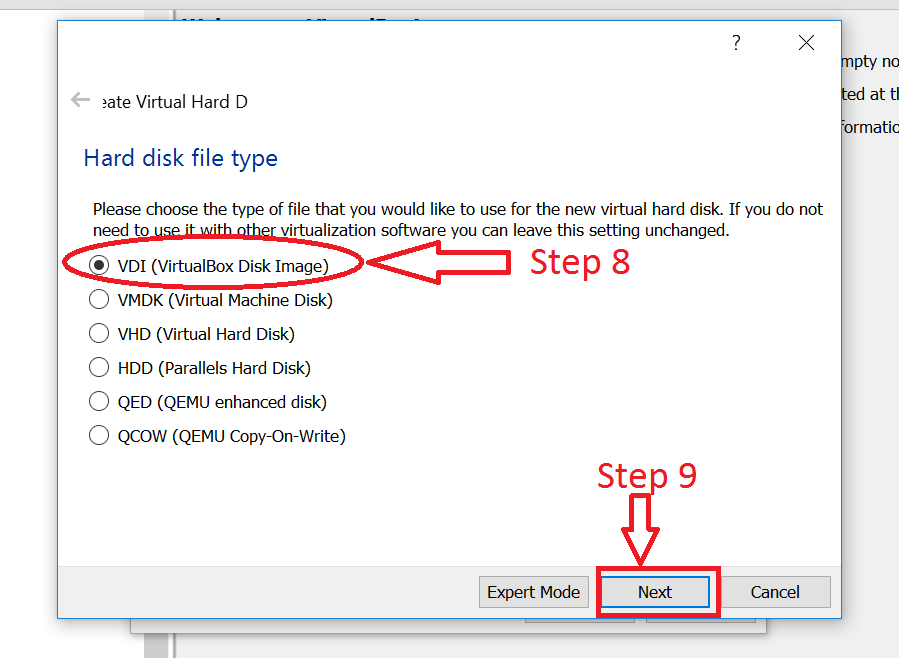
Step 8: Select “VDI (VirtualBox Disk Image)”
Step 9: Click on “Next” Button
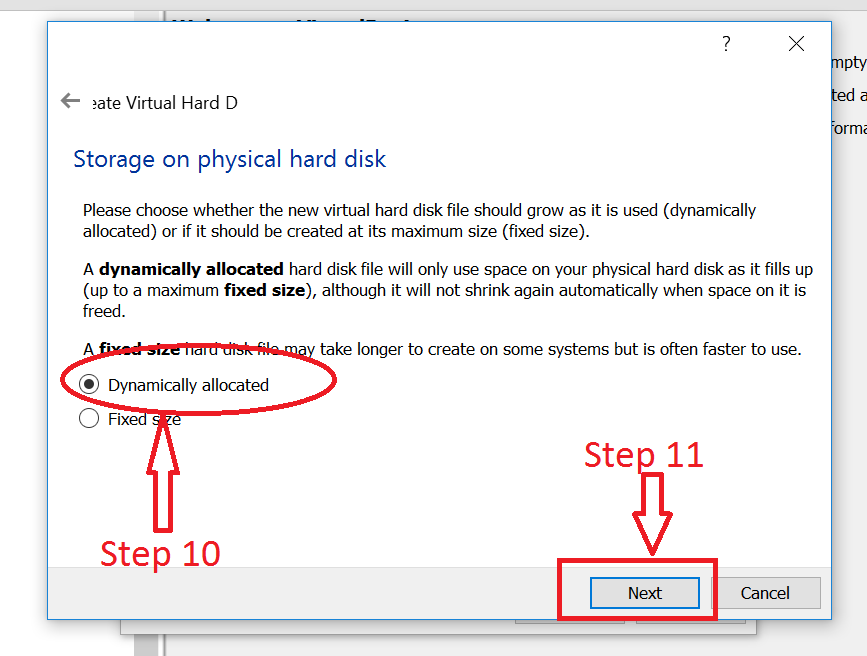
Step 10: Select “Dynamically allocated”
Step 11: Click on “Next” Button
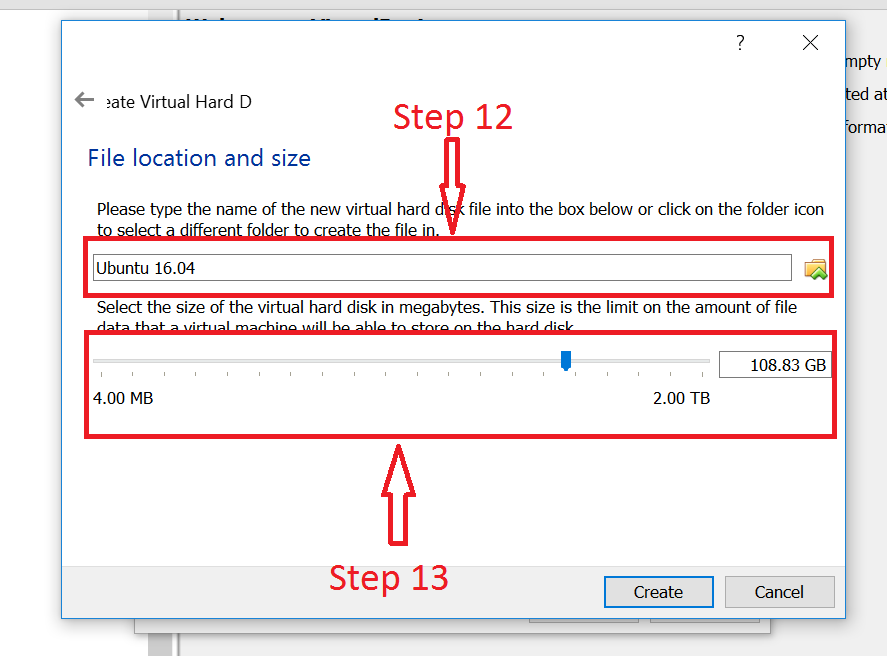
Step 12: Choose the settings as mentioned in image or if you like to use a different folder, click on folder icon.
Step 13: Select the Size of your virtual hard disk in megabytes. I goven 108.83 GB, and then click on “Create” button.
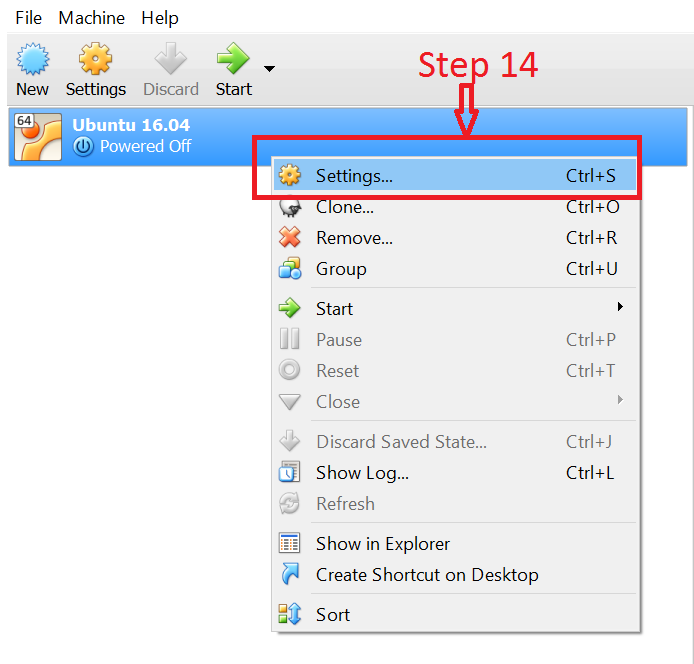
Step 14: Now, Right Click on your Virtual Machine(Ubuntu 16.04), and then click on “Settings”
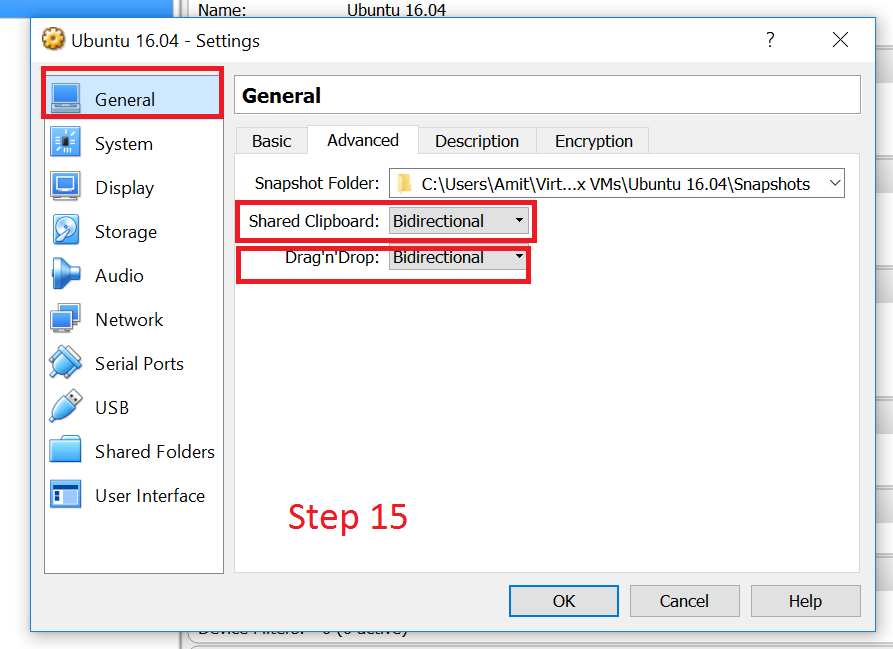
Step 15: Click on “General” Tab and Choose Shared Clipboard and Drag ‘n’ Drop as “Bidirectional” from the drop down, and then Click on “Ok” Button.
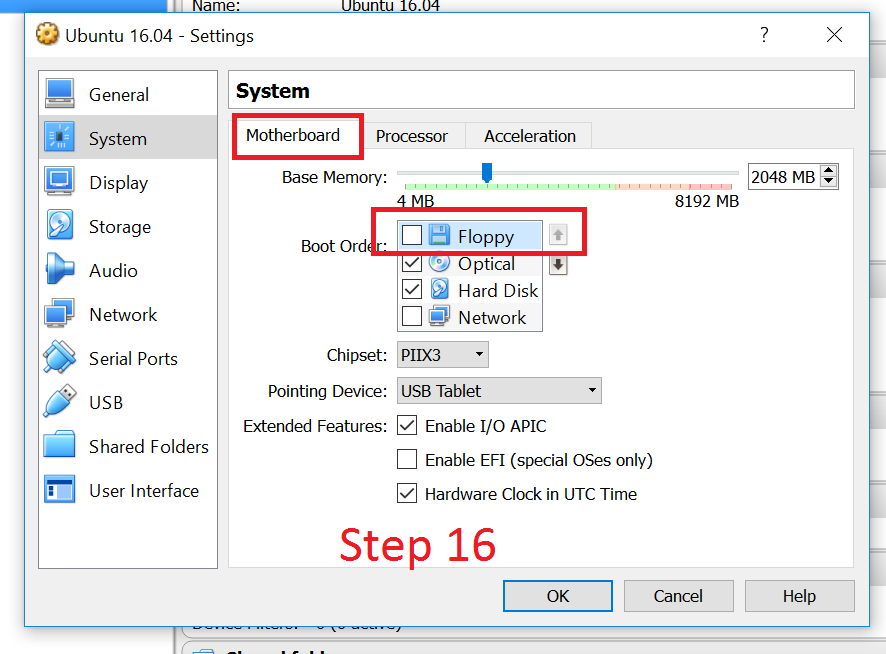
Step 16: Click on “System” Tab and Choose “Motherboard”, UnCheck “Floppy”.
Note: Do not click the “Ok” button as we are not finished setting up the system settings
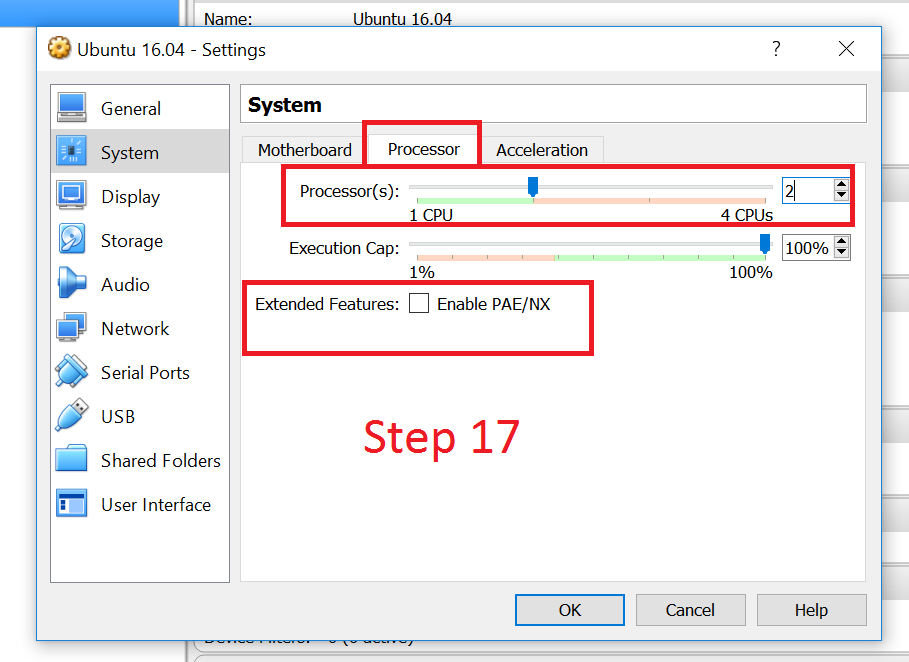
Step 17: Click on “Processor” Tab and select the number of processors that you want to use, I selected 2. If you want to enable Extended features,you can do that. I have not done that. Click on “OK” Button.
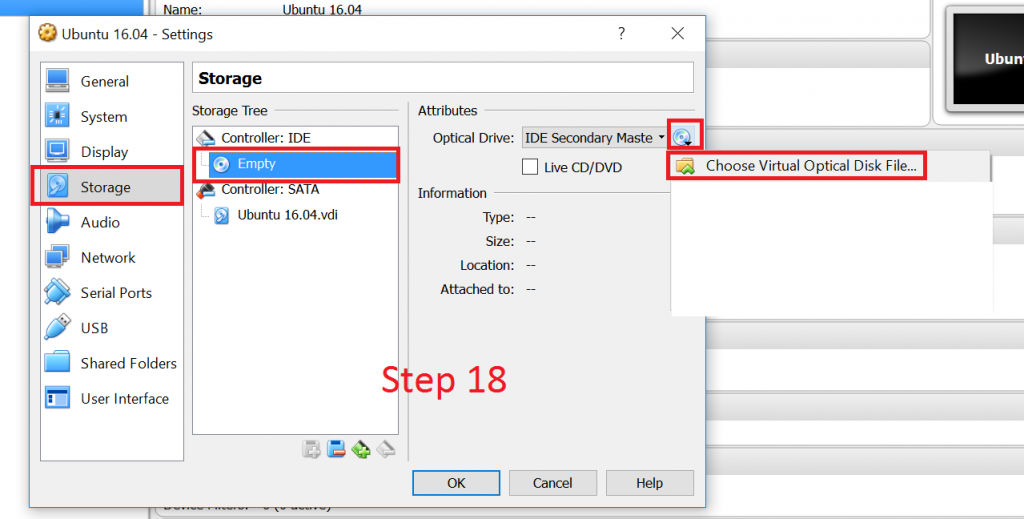
Step 18: Click on “Storage” Button, Click on Empty. On the Option “Optical Drive”, click on Little CD icon and “Choose Virtual Optical Disk File”.
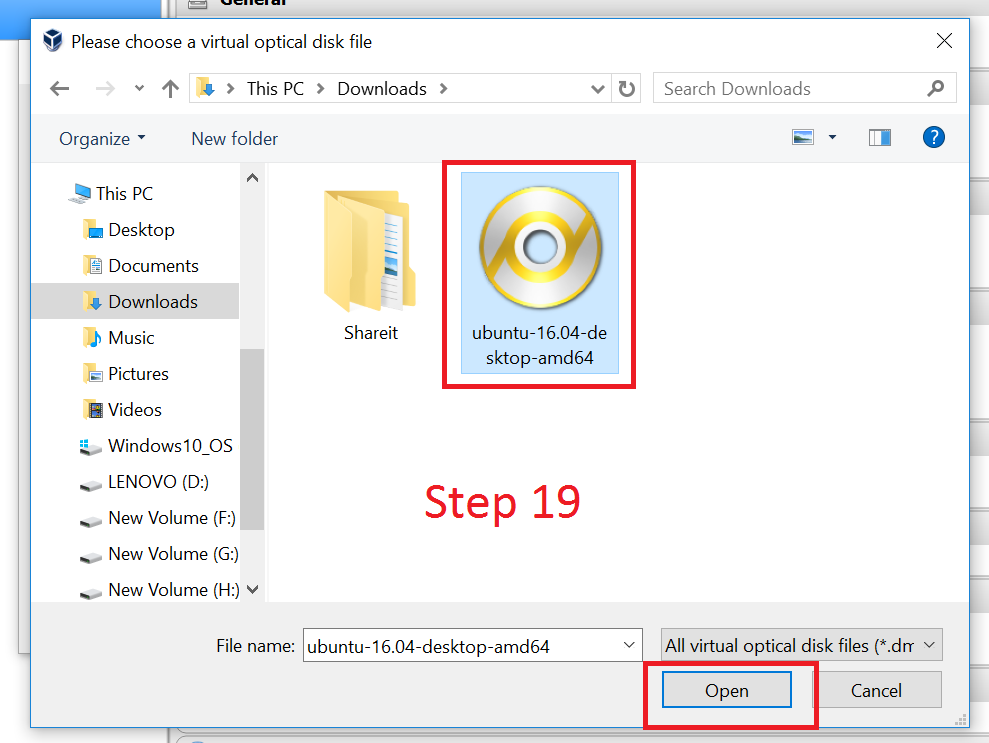
Step 19: Go to the folder where you have downloaded the “Ubuntu 16.04” ISO file, and the click on Open Button.
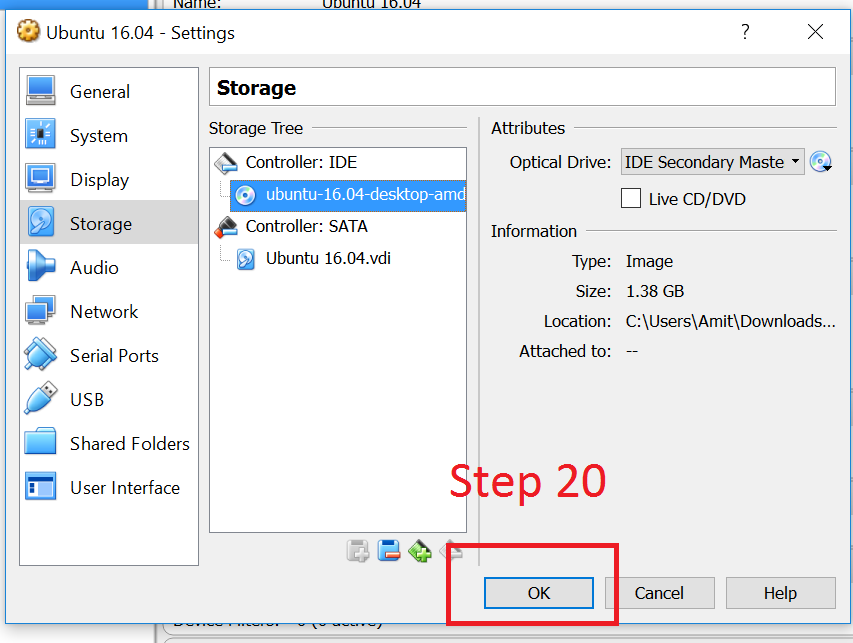
Step 20: Click on “Ok” Button.
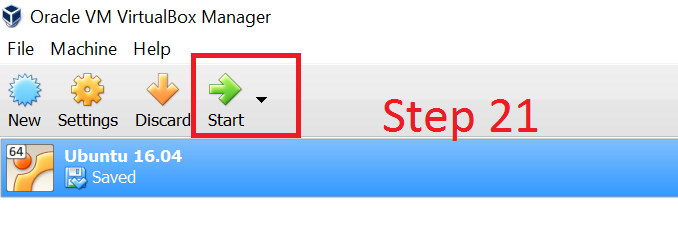
Step 21: Click on “Start” Button.
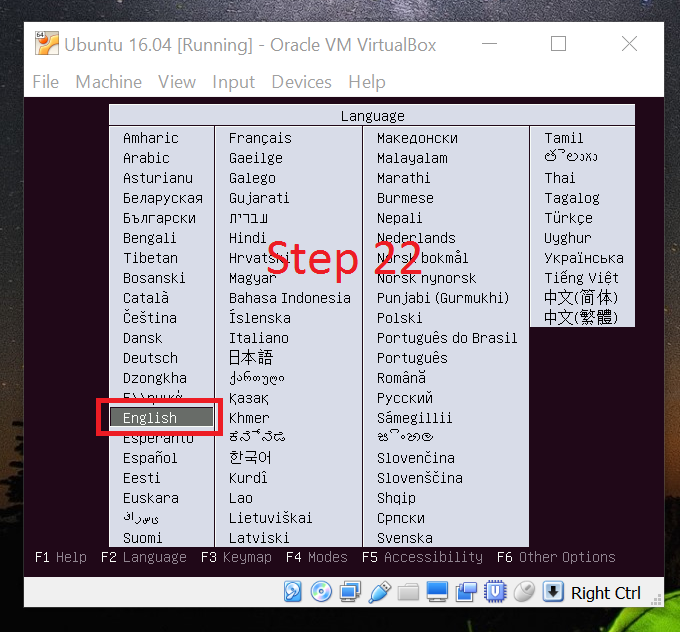
Step 22: Select “English” as your Language.
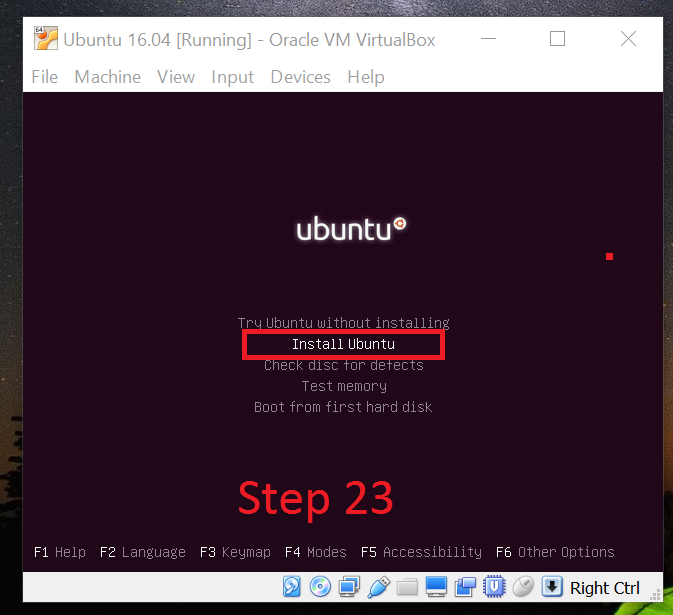
Step 23: Select “Install Ubuntu” and hit Enter key on your keyboard.
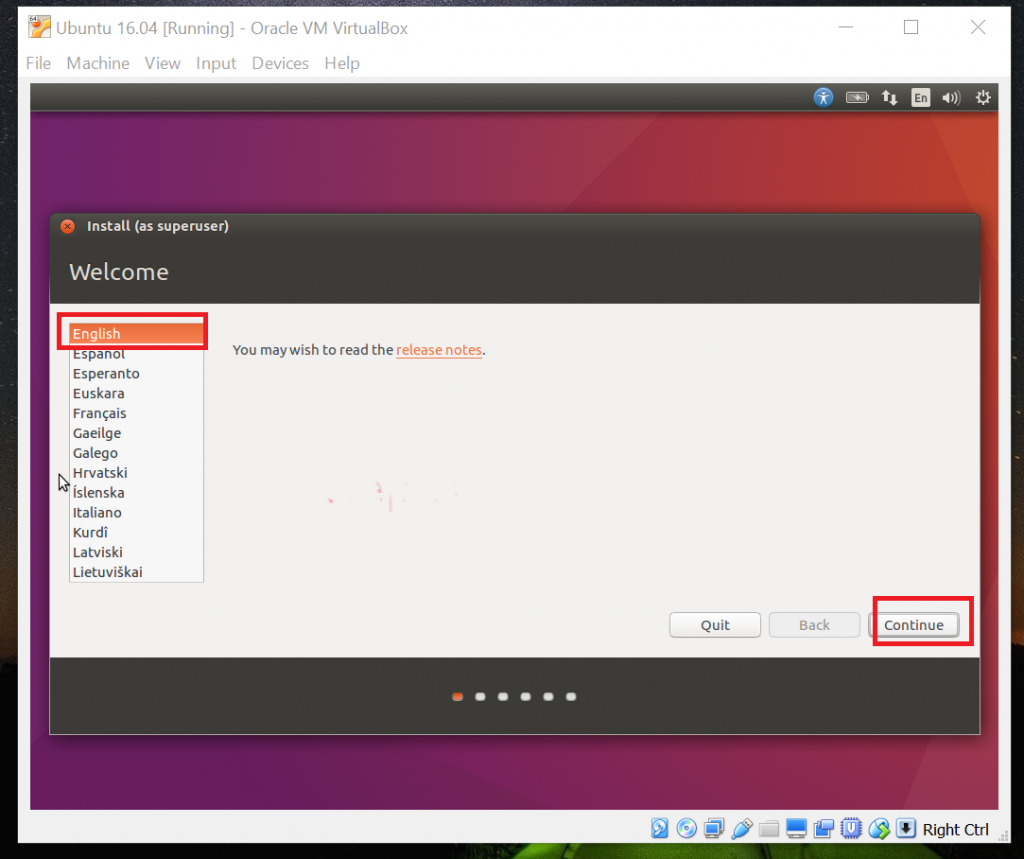
Click on English, and then Click on “Continue” Button.
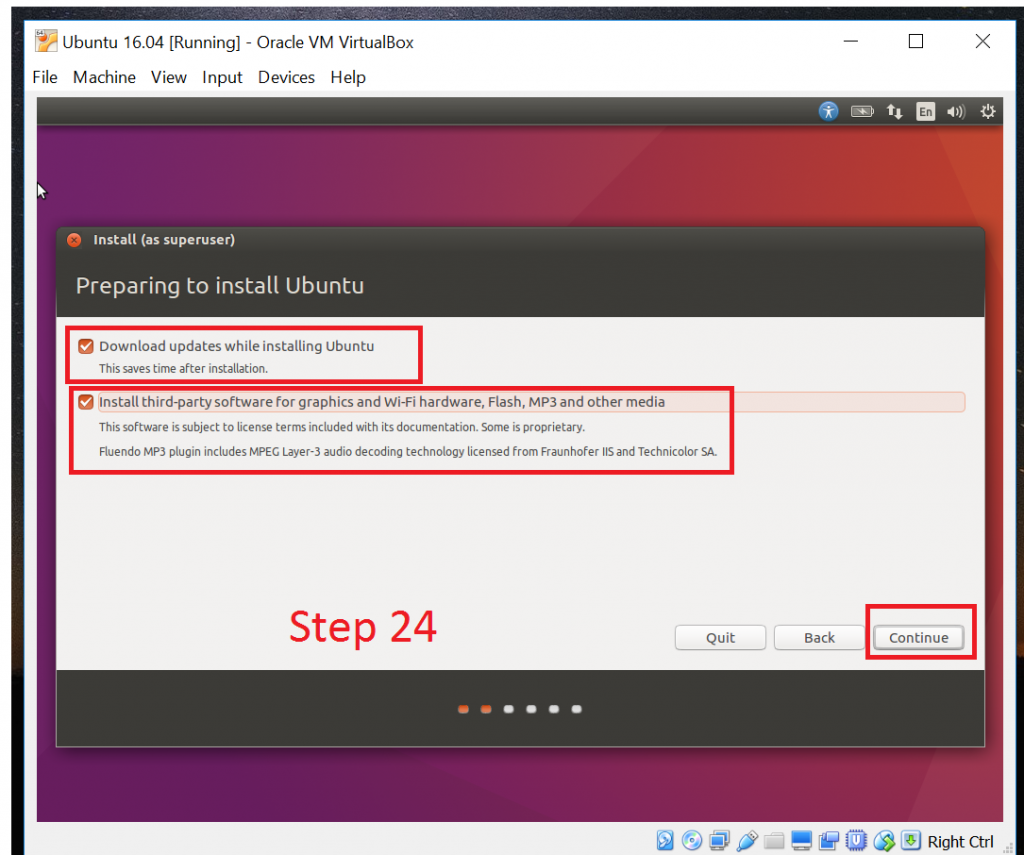
Step 24: Click on “Download updates while installing Ubuntu” and “Install third party software for graphics and Wi-Fi hardware, Flash, MP3 and other media” After that, Click on “Continue” Button at the bottom right of window.
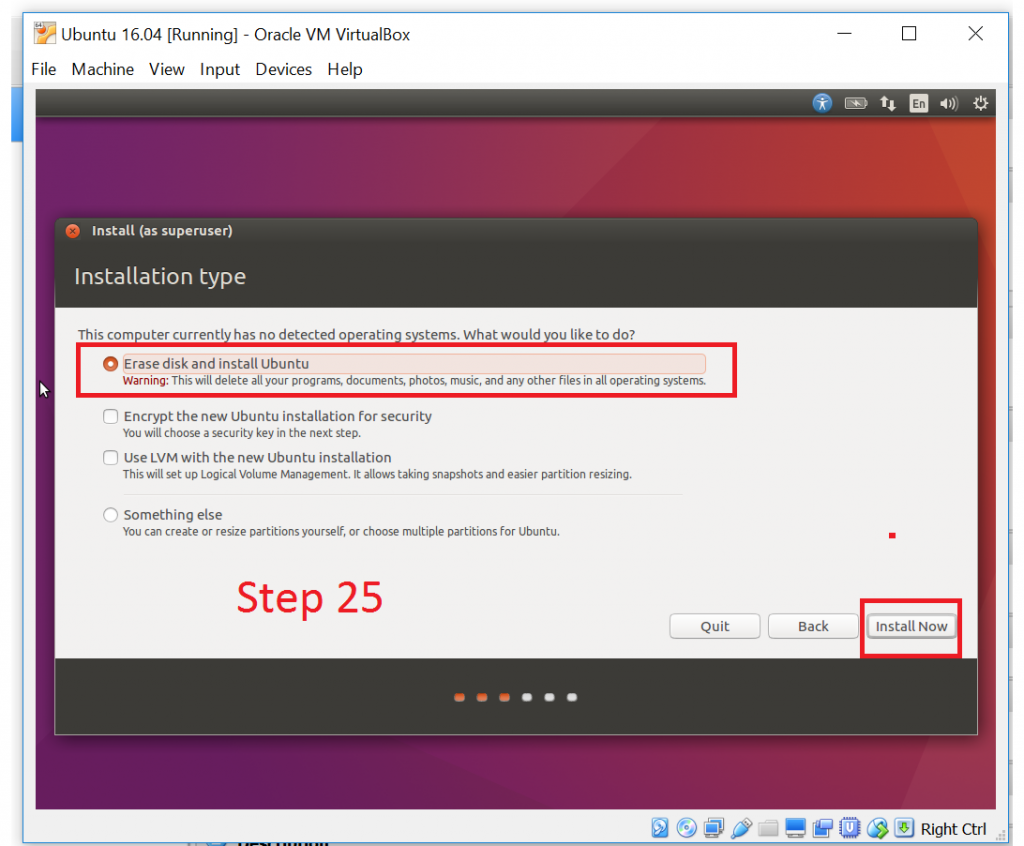
Step 25: Click on Option “Erase disk and install Ubuntu” as we are installing on Virtual Box, and then click on “Install Now” button.
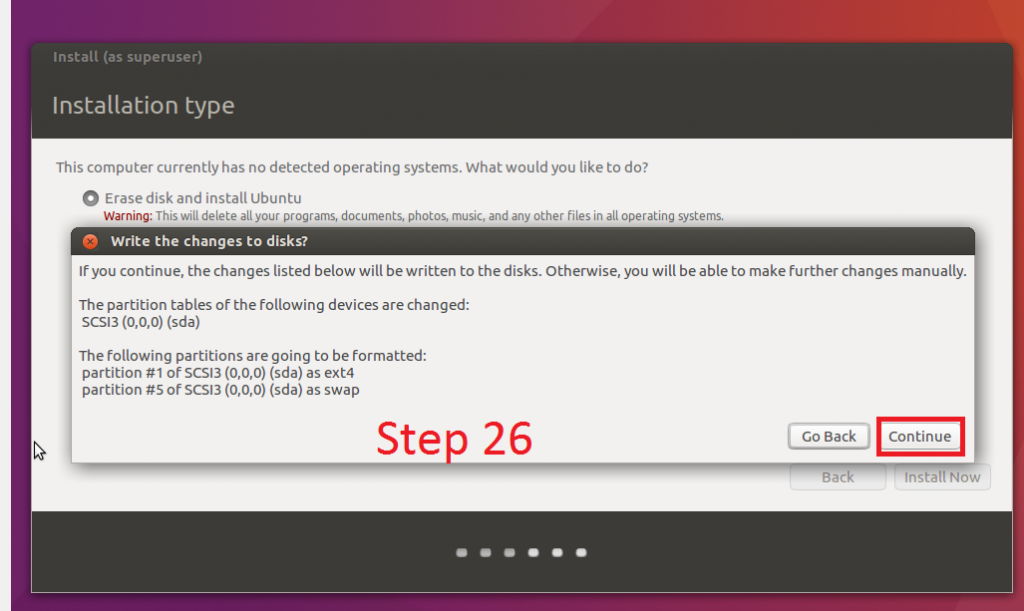
Step 26: Click on “Continue” button.
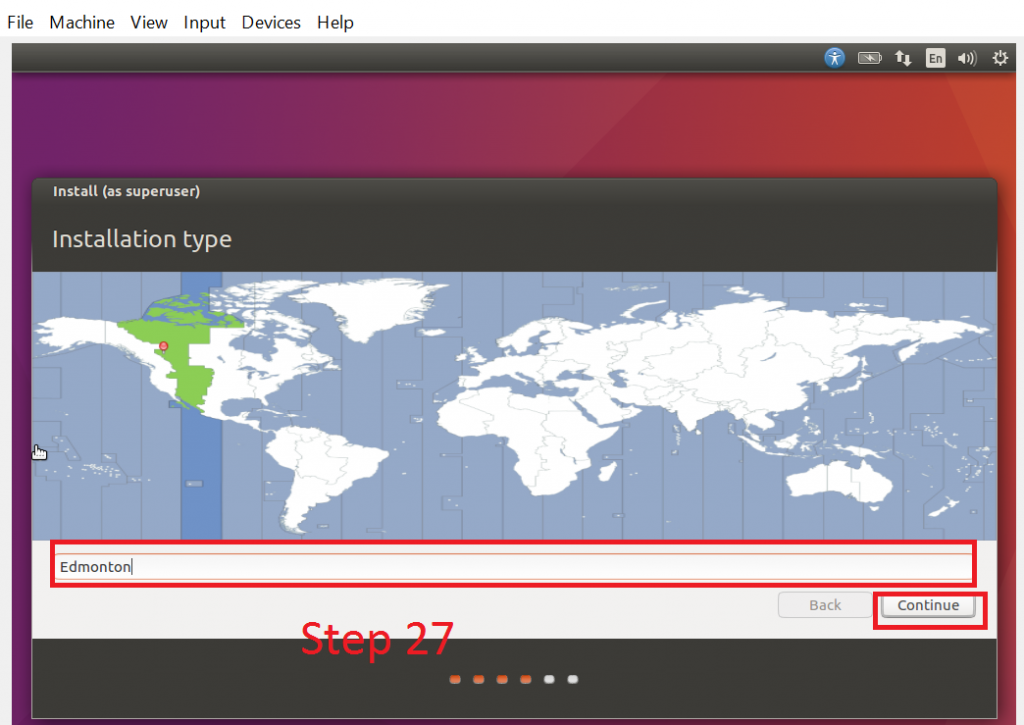
Step 27: Choose your location from the map and click on “Continue” button.
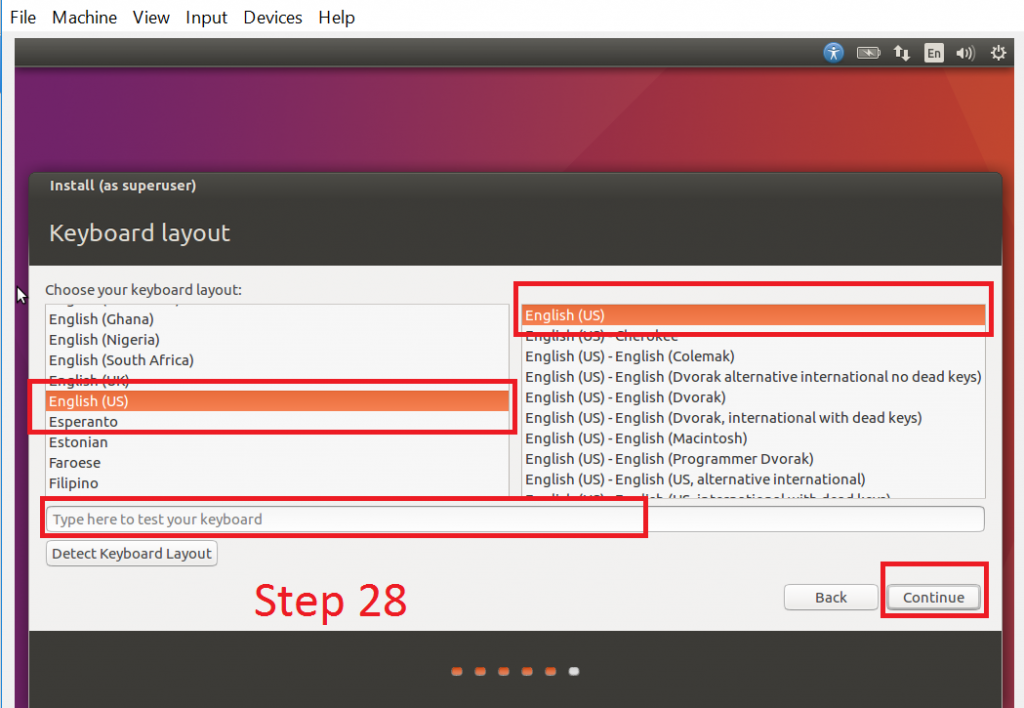
Step 28: Choose your keyboard layout, you can also type in the box to test your keyboard, and then click on “Continue” button.
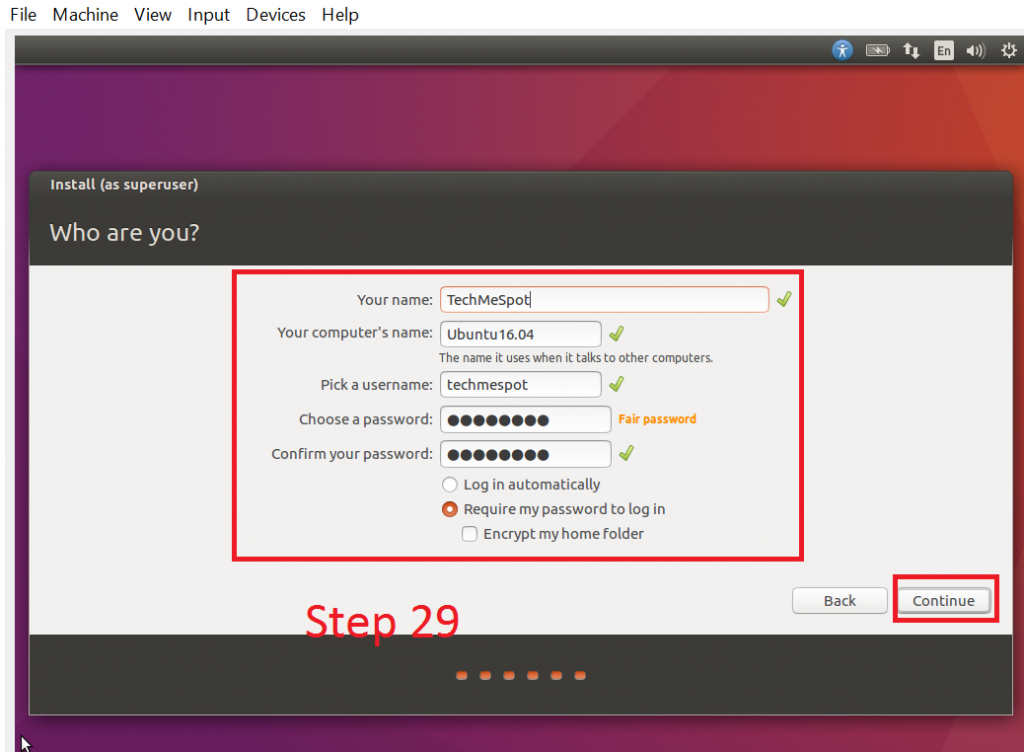
Step 29: Fill the information above like your name,computer’s name,username,password, and then click on “Require my password to Log in”. Click on “Continue” button.
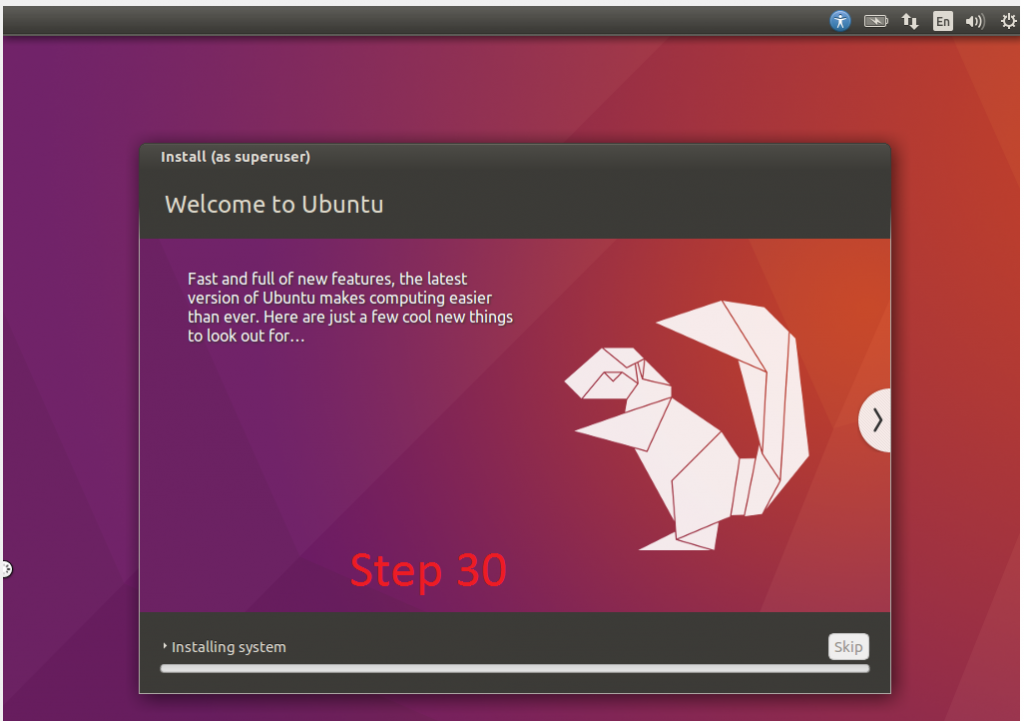
Step 30: As you can see it’s installing the system.
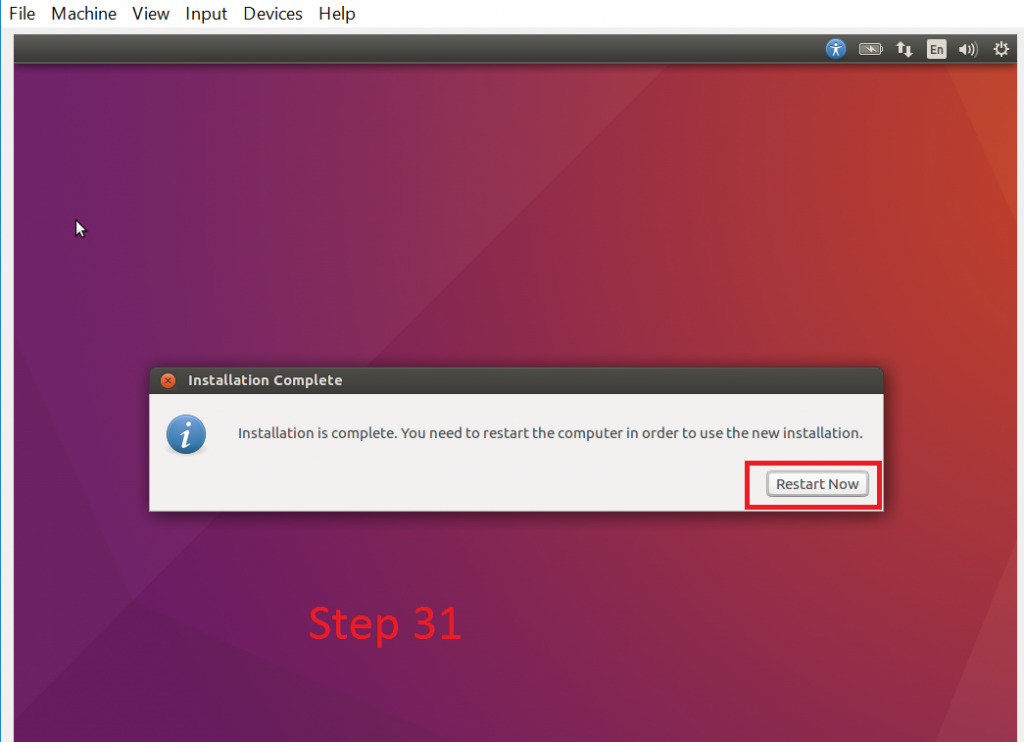
Step 31: Click on “Restart Now” button.
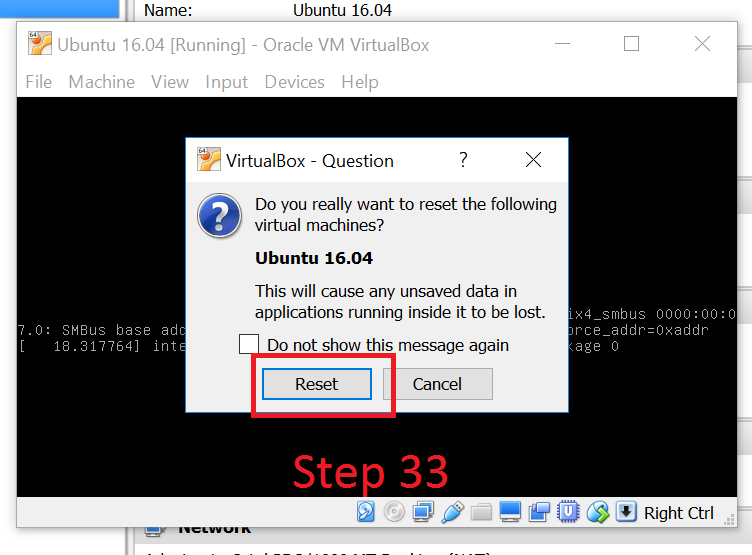
Step 32: If you see the error message, Click on “Machine”, and then click on “Reset”.
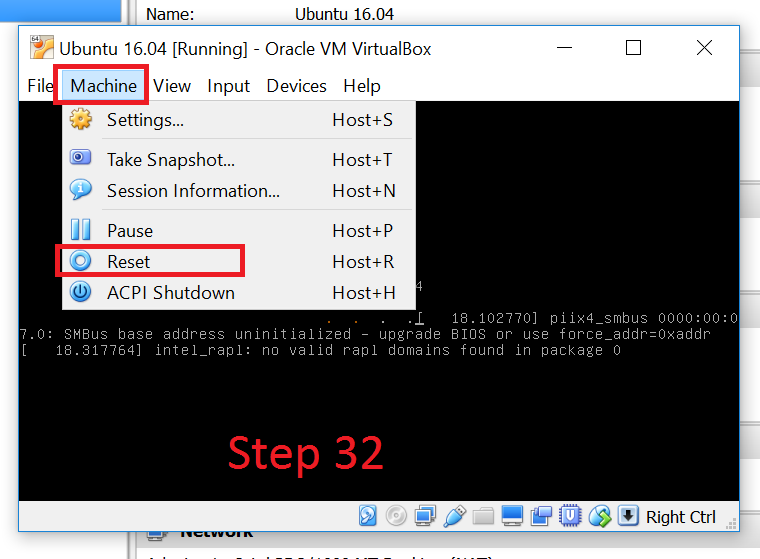
Step 33: Click on “Reset” Button.
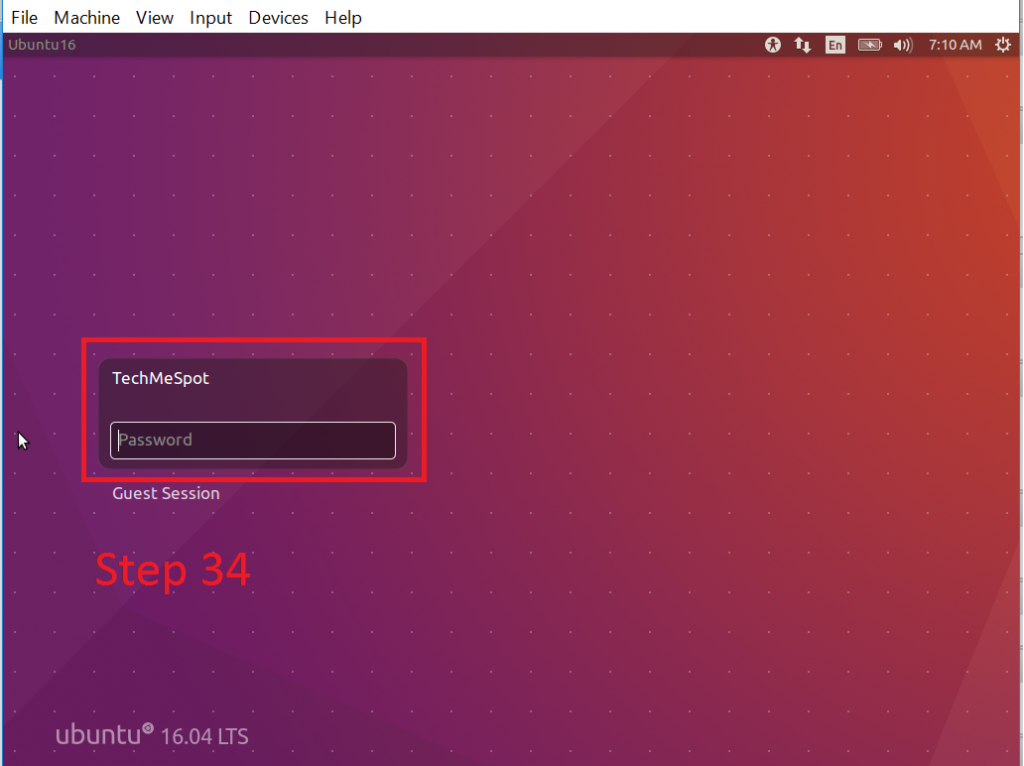
Step 34: Enter the Password that you have given in Step 29.
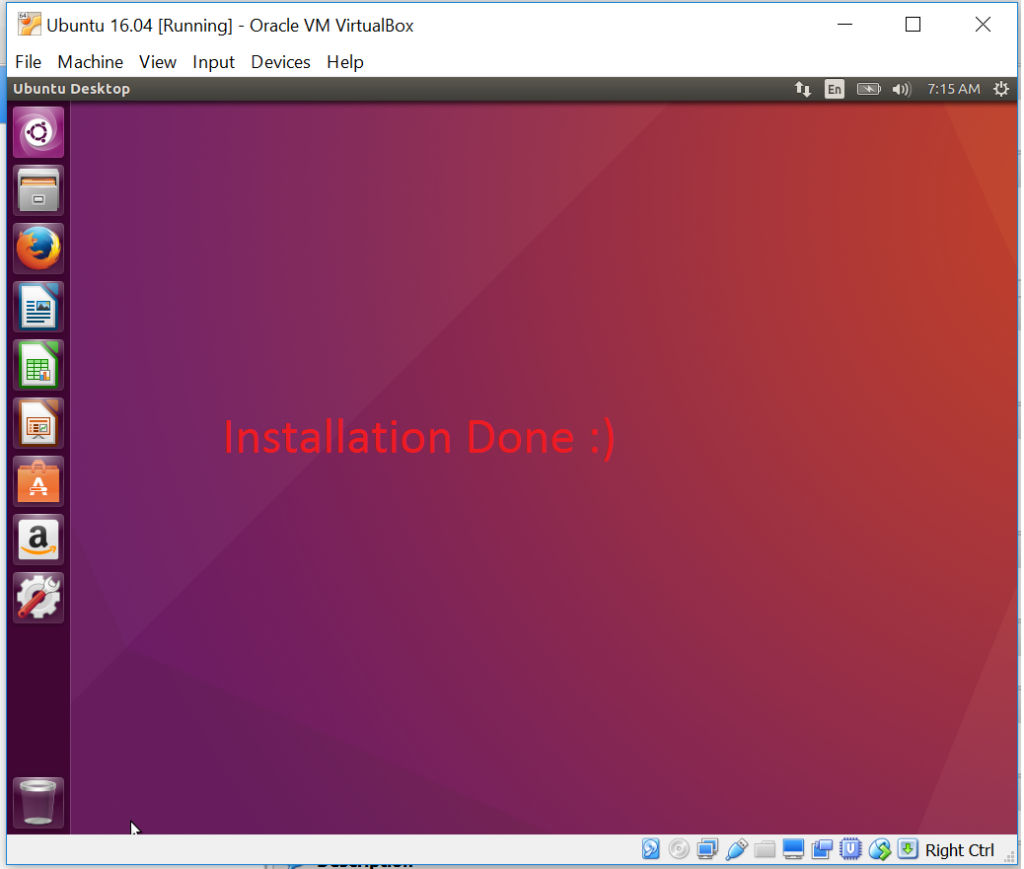
Congratulations, You have now installed Ubuntu 16.04 On VirtualBox.


Leave a Reply